Crispy, No-bake and Macro-friendly Protein Bar
Course: Snacks9
servings15
minutes15
minutesVersion 1 — Macro-Friendly: Uses more protein powder and less regular peanut butter for a lower-calorie, lower-fat bar. The texture is slightly firmer and more crumbly, so a small amount of unsweetened soy milk is used to help everything bind.
Nutrition information for each bar divided equally without toppings:
Calories: 218, Protein: 15g, Carbs: 23.4g, Fat: 7.9g
Version 2 — Texture-First: Uses less pea protein and powdered peanut butter and more natural peanut butter. It comes together more easily without additional milk and produces a softer, less crumbly and richer bar while still keeping the crispy rice texture. It is higher in calories and fat than Version 1.
Nutrition information for each bar divided equally without toppings:
Calories: 295, Protein: 17g, Carbs: 27g, Fat: 14.7g
Ingredients
- Dry Ingredients – Version 1 (Macro friendly)
100g (4 scoops) Sprout Living unflavoured pea protein powder
50g (~1/2 cup) powdered peanut butter
15g (2 tbsp + 1 tsp) cacao powder
70g One Degree sprouted brown rice crisps
1/4 tsp sea salt
- Wet Ingredients – Version 1
125g (~1/2 cup) maple syrup
60g natural runny peanut butter
1 tsp (5g) vanilla extract
*3-4 (30-45 ml) tbsp unsweetened soy Milk (See recipe notes)
*50g dark chocolate (I used 70%) (See recipe notes)
- Version 2: Crispier & Richer — Ingredient Changes
200g natural runny peanut butter
80g (~3 scoops + 1 tsp) unflavoured pea protein powder
40g powdered peanut butter
*All other ingredients and instructions remain the same as Version 1.
- Optional Toppings:
Goji Berries
Toasted coconut flakes
Cacao Nibs
Crushed peanuts or any other nuts
Directions
- Prepare the pan: Line an 8 × 8-inch baking pan with parchment paper and set aside.
- Combine the dry ingredients: In a large mixing bowl, whisk together the pea protein powder, powdered peanut butter, cacao powder and sea salt until evenly combined. Add the crispy rice cereal and gently mix again.
- Prepare the peanut butter mixture: Add the maple syrup and natural peanut butter to a small saucepan. Warm over low heat, stirring until smooth and combined. You only want the mixture lightly warmed—do not bring it to a boil.
- Add the vanilla: Remove from the heat, stir in the vanilla extract, then immediately pour the warm peanut butter mixture over the dry ingredients.
- Mix until combined: Stir thoroughly, making sure the dry ingredients and crispy rice cereal are evenly coated. For Version 1:The mixture will initially look dry and crumbly. Add 1 tbsp of unsweetened soy milk at a time, mix thoroughly, then add up 3 more tablespoon of milk only if needed. Add the extra liquid gradually—you want the mixture to clump and hold together without making the rice cereal soggy. You may need to use clean hands toward the end to bring everything together.
For Version 2: No additional milk should be necessary. The higher amount of peanut butter should allow the mixture to bind more easily. - Check the consistency: The mixture is ready when you can squeeze some in your hand and it holds together rather than immediately crumbling apart.
- Press firmly into the pan: Transfer the mixture to your prepared 8 × 8-inch pan. Using your hands and/or a spatula, firmly press and compact the mixture into an even layer. Don’t be gentle here—the more firmly you compact it, the better the bars will hold together once set.
- Add the chocolate topping: Place the dark chocolate in a microwave-safe bowl and microwave in 30-second intervals, stirring between each interval, until completely melted and smooth.
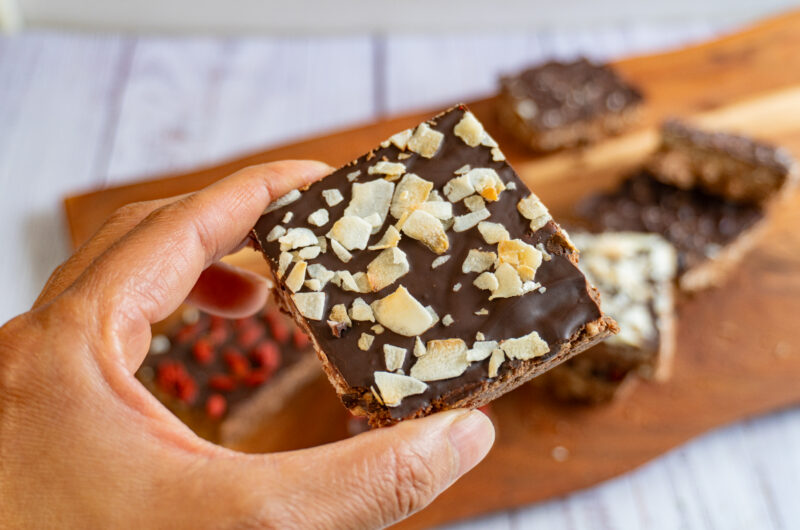
- Finish the bars: Pour the melted chocolate over the bars and spread it evenly with a spatula. Sprinkle with sea salt, or add optional toppings such as cacao nibs, goji berries or toasted coconut.
Note: Optional toppings are not included in the listed nutrition information and will change the calories and macros. - Set: Transfer the pan to the freezer for 30–40 minutes, or until the bars are firm enough to slice
- Slice into 9 bars: Lift the set mixture out of the pan using the parchment paper and place it on a cutting board. Using a sharp knife, cut into thirds in one direction and then thirds in the opposite direction to make 9 equal bars.
- Storage Instructions: Store the bars in an airtight container in the refrigerator for up to 7–10 days.
For longer storage, freeze in a freezer-safe container for up to 3 months. Place parchment paper between layers to prevent sticking. If frozen, let the bars sit at room temperature for 10–15 minutes before enjoying for the best texture.
Recipe Video
Notes
- – If you have access to soy crisps, swap the rice crisps for soy crisps to boost the protein even more!
– I don’t like using quinoa puffs in this recipe as quinoa puffs don’t stay crispy.
Kick off with us and burrow into the entire казино кирки gallery of casino games to pick through.
7gf1rb
finlz3
Amazing recipe. Can’t wait to make it!❤️
n25dbr
2axtvr
fll3am
Kick off with us and burrow into the entire казино самолетик gallery
of casino games to pick through.